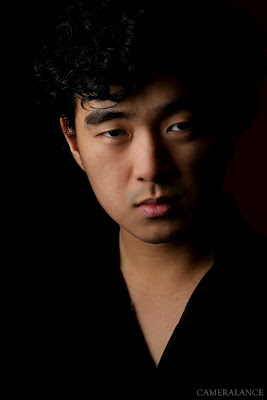
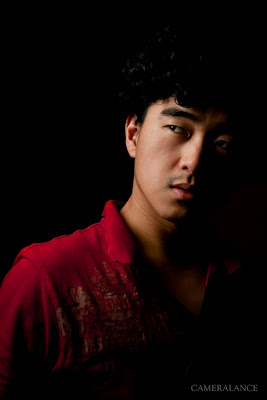
Frankly speaking it was pretty difficult to manually focus all by myself. All I had was my lightstand as a pre-focus subject and apparently the stand's "Depth of Field" is different with my face. Plus I was on a long focal length which made the DoF narrower. I know there is a calculator on the net but I was lazy to do the math so in the end I set camera to f/16. Instead of just showing you guys pictures of my face, I'm going to include a diagram along with it to show you how it was done. Keep in mind that I suck at drawings, I think this applies to most photographers. Before we begin, we need to understand the super long and sound sooo complicated theory of Inverse-square law. To put it in studio lighting terms, its about flash to subject distance, flash to background distance or could be flash-subject-background distance all three together at the same time. It's really hard for me to put everything into words so I'll try to explain it as we go along.
This is a pretty standard set up. Light on camera left, about 45 degree from my(subject's) point of view.
This is where the Inverse-square law comes into play. The light is closer to me than background even though the distance between me and background is only 1-2 meters. I used a really low power output on my flash in hopes that the light doesn't light up the wall behind me. But if you look closely on the right side of the photo, you can see a little red from the wall. Now compare the "brightness" of my face with the wall and think about the distance of flash, me and the wall. That's a general idea of inverse square law. Also, notice the softbox's angle in the diagram, I don't aim it directly at me but used the lights from the edge to light my face. The reason being is that light from the center of the box is stronger or "hot" compared to the edge of the box. Moreover I wanted the background to be dark.
*As expected, white inner surface of the box makes the light super diffused =D
I increased the height of the box and slightly turned to the wall a little to get a bit colour. You can tell by my shadow on lower right of the frame and also the catch lights in my eyes. I added a bit of vignette in post-processing on top right to make the red circular.
So I moved the box to almost at my side and turn it more towards the camera. The wall is completely black because no light is hitting on to the wall. I also had my lens hood attached so that I don't get flares.
The Dark Knight much?
Simple straight forward backlight trick. The difference is I increased the height of the box so that the light hit more of my curly hair and doesn't hit my shoulder.
A similar set up as the first image. I pump up flash power to make it more punchy/contrast. Add a little warmth in white balance during post-processing. As I mentioned about light coming from center of a softbox being "hot" compare to the edge, you can tell that by looking at my fingers. While my face is exposed nicely, some part of my fingers are nearly overexposed.
The angle of light source and the distance between flash, subject and background can affect your image greatly. A little tilting, some turning, moving a few steps a part can do a lot. Try do some experiment and see for yourself. By the way, I've touched only the surface of Inverse-square Law. There is a thing about by moving your subject further or closer to light source, you are increasing or reducing the light power hitting on to your subject. Sounds logical but there is a calculation in it. You are welcome to look-it up to see for yourself.
Thanks for reading.


the science behind good photos is revealed! O_O
ReplyDeleteVery nice shots!
ReplyDelete